Why the Formula Is Not the Problem
If you already know the superheat and subcooling formulas, you are not the problem. The hard part is everything around the math: unstable operation, a dirty coil, a clamp in the wrong place, the wrong refrigerant column, or a target that came from a generic chart instead of the equipment you are actually standing in front of. A superheat subcooling calculator is useful, but only after you have disciplined the inputs.
This guide is written like a field routine instead of a classroom explanation. The goal is a repeatable sequence you can run on a roof, in a mechanical room, or on a call where the customer is standing there waiting for an answer. Copeland's PT Pro and Copeland Mobile tools follow the same logic: pressure-temperature conversion first, then superheat or subcooling math, then interpretation. That is the right order, because the answer is only as good as the pressure, the temperature, and the operating condition underneath it.
Once you understand that, the calculator stops being a shortcut and starts being a guardrail. It keeps the subtraction consistent, but it does not replace the judgment you need when the system is not stabilized or when the service data conflicts with the number on the screen.
Start With the Equipment Documentation
Before you trust any number, read the nameplate, the charging chart, and the service literature for that unit. Manufacturer charging charts and equipment documentation take priority over any generic guidance or app. If the unit calls for a specific subcooling target at a specific indoor and outdoor condition, that target wins. If the manual says to charge by weight or follow a particular field procedure, follow that procedure first and use superheat or subcooling as the verification step.
Copeland's refrigeration guidance matches that approach. For subcooling, the method is to compare the liquid line temperature with the saturation temperature derived from condensing pressure after the system has stabilized. For superheat, compare suction line temperature with the saturation temperature equivalent of suction pressure. The equations are short. The context around them is what keeps you from making a bad call because you trusted a number that was taken too early or at the wrong point.
Copeland also notes that very low or very high superheat can suggest undercharge or overcharge tendencies in certain situations, but that reading only matters when airflow, load, and stabilization have been checked. In the field, that is the difference between a clue and a false lead.
The Repeatable Five-Step Sequence
The best field techs do not improvise their measurement order every time. They run the same sequence until it becomes automatic, then they only change the parts the equipment forces them to change.
- Verify the refrigerant and charging method. Check the nameplate, the service port label, and any field notes. Make sure you know whether you are dealing with a TXV system, a fixed orifice, or a unit with a manufacturer-specific charging chart.
- Let the system stabilize. After a startup, fan change, coil cleaning, or refrigerant adjustment, wait until pressures and temperatures settle. A reading taken while the system is still chasing load is only a snapshot of a moving target.
- Take pressure from the correct port. Use suction pressure for superheat and condensing pressure for subcooling. Do not guess at which side is more convenient in the moment.
- Measure temperature at the right point. Clamp to the suction line for superheat and the liquid line for subcooling. Keep the clamp tight, insulated, and away from obvious heat sources or heat sinks that distort the reading.
- Convert, subtract, and sanity-check. Use the pressure-temperature relationship to find saturation temperature, then do the subtraction, then compare the answer to the equipment target and the operating context.
That sequence sounds simple because it is simple. The part that gets people in trouble is skipping the boring middle step where the system settles down and the readings become trustworthy. A clean-looking math answer on unstable data is still bad data.
Let the System Run Where the Reading Lives
If you are charging a cooling system, do not read the numbers the second the compressor starts. The outdoor fan, indoor blower, and metering device all need time to settle into the same operating state. On a heat pump, make sure you know which mode you are in before you trust the pressure-temperature relationship. A correct calculation on top of the wrong operating mode is still the wrong answer.
That is also why service calls get messy after a coil wash or a filter change. Airflow changes first, pressure follows, and line temperature may lag. If you read too early, you will often chase a number that would have corrected itself in another minute or two.
Measure the Line, Not the Surface of the Unit
For superheat, the suction clamp belongs on the suction line, not on a compressor shell or on a piece of tubing that has already been warmed by ambient air. For subcooling, the clamp belongs on the liquid line, not on a service valve body that is carrying extra heat from nearby components. If the line is insulated, move the insulation, measure, then restore it. A few seconds of care here saves a lot of bad conclusions later.
On blended refrigerants, the correct saturation temperature column matters just as much as the clamp location. Use the dew point for superheat and the bubble point for subcooling. On a refrigerant with minimal glide, that mistake may be small. On a blend with noticeable glide, it can push you far enough off target to send you in the wrong direction.
Know What the System Is Trying to Tell You
A TXV system and a fixed-orifice system do not use the numbers the same way. On a TXV system, subcooling usually tells you more about charge level, while superheat helps you understand evaporator feeding and airflow. On a fixed-orifice system, superheat is often the primary charging method because the metering device does not actively regulate flow. That means indoor wet-bulb and outdoor dry-bulb conditions matter, and the target has to come from the manufacturer chart for that exact equipment and load.
On many comfort-cooling systems, moderate superheat and subcooling numbers are normal, but the exact target belongs to the equipment and the load. A reading that is a few degrees off may matter less than a dirty coil, a weak blower, or a fan issue that is slowly changing the whole operating picture. Read the trend, not just the snapshot.
Do not turn that into a shortcut around the rest of the diagnosis. Airflow restrictions, dirty filters, condenser contamination, liquid line restriction, and a drifting expansion device can all distort the number. The calculator gives you the arithmetic. Your job is to connect the arithmetic to the machine.
Common Ways Techs Sabotage Good Numbers
- Reading before stabilization. The compressor, blower, and outdoor fan may be running, but the system has not yet settled into the state the chart expects.
- Measuring at the wrong spot. A clamp on the wrong length of tubing or a pressure reading taken across a restriction can make the math look better than the job really is.
- Using the wrong refrigerant column. If the blend uses dew and bubble points, mixing them up can make a decent reading look broken.
- Assuming every low superheat means overcharge. Low superheat can also come from excess airflow issues, a bad metering device, or a system that has not stabilized.
- Trusting the calculator to fix bad inputs. A faster answer is not a better answer if the pressure or temperature was wrong to begin with.
The discipline here is simple: if the number feels wrong, do not force it into a diagnosis until you have checked the setup. Most bad calls come from confidence in a rushed measurement, not from the equation itself.
A Five-Minute Closeout Checklist
Before you leave the call, run the same short checklist every time. It keeps you from leaving behind a diagnosis that only made sense in the moment.
- Confirm the target. Verify whether the equipment wants a specific subcooling value, a charging chart, a weighed charge, or a superheat target for the current load.
- Record the context. Note outdoor temperature, indoor conditions, airflow changes, and anything you adjusted before you took the reading.
- Check the direction of the numbers. If superheat or subcooling is only slightly off, ask whether the system is still stabilizing before you make a larger change.
- Compare against the machine, not the memory. Your memory of a similar unit is helpful, but the data for this unit is what matters.
- Leave a trail. Write down the pressure, saturation temperature, line temperature, and final conclusion so the next tech is not starting from zero.
This is where a good workflow pays off. You are not just solving a problem for today; you are building a record that can be trusted on the next service call.
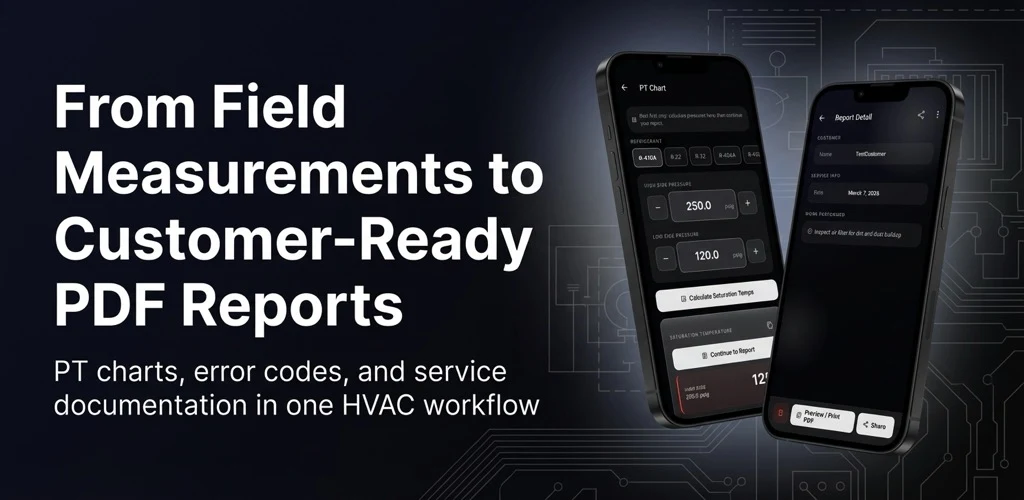
Where RefriPro Fits in the Truck
If you want one offline reference that keeps PT charts, superheat and subcooling calculations, duct sizing, error code lookup, and PDF service reports in the same place, RefriPro is built for that style of work. It is the kind of app you open when you need an answer fast and you do not want to juggle three different tools to get there.
The value is not just that it calculates. The value is that it supports the same field sequence this article is pushing: verify the equipment, measure the right points, run the math, and leave a record that you can defend later. That matters more than flashy features, especially when signal is weak, the roof is hot, and the next call is already waiting.
Do Not Stop at the Number
Superheat and subcooling are diagnostic tools, not verdicts. If the math points one way but the airflow, load, or equipment documentation points another, slow down and look at the system as a whole. A number that does not fit the machine is usually telling you that one of your inputs is wrong or that the operating condition has not settled yet.
That is the real field skill: not memorizing formulas, but building a process that survives bad weather, rushed calls, and equipment that never behaves like the textbook version. Once that process is automatic, the calculator becomes a time-saver instead of a crutch.
Keep the order straight: verify the unit, stabilize the system, measure the correct points, convert the pressure to saturation, and only then run the subtraction. That is how a superheat subcooling calculator becomes a trustworthy field tool instead of just another app on your phone.